🚀 Elevate Your Creativity with the Ender 3 V2 Neo!
The Official Creality Ender 3 V2 Neo 3D Printer is designed for both beginners and seasoned makers, featuring 95% pre-assembly, CR Touch auto leveling, a user-friendly 4.3-inch interface, and a unique PC spring steel magnetic build plate. With a silent motherboard for low-noise operation, this printer is perfect for creating high-quality 3D models in a variety of materials.


| Item Weight | 17.2 Pounds |
| Item Dimensions D x W x H | 17.24"D x 16.7"W x 18.58"H |
| Printing Technology | USB, SD card |
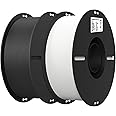
| Compatible Material | Polylactic Acid |
| Voltage | 220 Volts |
| Connectivity Technology | USB, SD card |
| Operating System | Windows, macOS |
| Power Consumption | 350 Watts |
| Compatible Devices | Laptop, Personal Computer |
| File Format | OBJ,AMF,STL,GCODE |
| Enclosure Material | Aluminum |
J**N
Incredible value for any tinkerer
After a bunch of research, I settled on an Ender 5 for an entry level printer, and I couldn't be happier.I'm comparing it to a pair of Ultimaker printers at my office (10x the price). Honestly, out of the box, the only thing it really needed is leveling the bed and increasing the extruder steps per mm with a 5-minute test. At that point I'd say it reached about 80% of the print quality of a new Ultimaker. For a grand total of another $25 I've added a new extruder, Bowden tube and connectors, and glass bed, and printed a hard support and cable strain relief for the bed. With these and more tuning of slicer settings, I'm consistently getting incredible looking and functioning prints. The stock magnetic flexible bed is actually pretty OK, the adhesion is great, but slightly bowed down in the center and leaves a rough bottom surface. I've learned to love plain clean glass for many materials, adheres great and then floats off as soon as it cools.My only real disappointment is the stability of the bed. It is just a flat plate that screws onto another flat plate that rides on the Z-axis, so the entire bed bends like a diving board. Wish it had a few small ribs to reinforce it. It's ok for small prints but I recommend printing some support arms early. The cables are also too short to manage nicely, but some spiral wrap can tidy them a bit. Mine has a Landy power supply, which is apparently worse than the Meanwell that some are shipping with, but zero issues so far.Know what you're getting into - it's still a hobbyist printer, your mileage may vary. I'm sure there's a lottery for DOA units as well, but mine was great. The FDM process itself has limits, and most of what you're paying for in a more expensive printer is the assembly, the features, and the tuning/setup done at the factory. This is a kit printer on a tight budget, but with some TLC can easily match the much more expensive printers. I chose it because it's easy to modify and widely popular so there are tons of user-created guides and printable upgrades. It works fine as-is, but for me half the fun is getting to make it mine and push its limits. The frame and XY platform are a great design and assemble very easily. Conceptually seems much more stable than the Ender 3 design. It doesn't have the bells and whistles like auto leveling and wifi, but these can be modded in for cheap too. The stock board/drivers are a little noisy, the silent upgrade are worth considering if it's in your living space. Do a little research on "things I wish I knew for my first 3D printer" and essential tools and printable upgrades, there is a great community around the 3D printing and Creality world. Many Ender 3 mods work for the Ender 5 as well.There are a number of Ender 5 issues you'll see around the internet that have already been fixed by the time I got mine in Nov-2019. An early unboxing video pointed out some issues caused by backwards parts in preassembled sections, but my version has reversible parts so the issue can't happen. The extruder now has a small brass insert where the filament spool feeds in so it doesn't wear down. The firmware on mine has thermal runaway protection enabled. I tested mine with every method I could find, and it always shut down safely within 60 seconds. Research and test this on yours before you ever consider printing unattended!If you're considering the Ender 3 vs Ender 5, I would lean toward the 5. The box frame design seems much more stable, and the wobbly bed can easily be stabilized.It came with 200g of white filament, an extra nozzle, clips that slightly improved the Bowden tube stability, a micro-SD card and USB reader, a spatula to help remove prints, a nipper/flush cutter that is good for trimming tube, filament, and excess material on prints, and a small set of tools that are enough to assemble and adjust everything. Didn't include a mini-USB cable (old trapezoid, not the usual cell phone kind. You can print from SD without it but need it if you want to tinker with the firmware).If you're on the fence, get one! The correct number of 3D printers to own is always N+1.
H**Y
Extremely user friendly printer! (And one common problem)
This is technically my first 3D printer. My ex had gotten an Ender 3 and I was excited about all the things we (he) could make. I consider myself to not be tech savvy at all. The Ender 3 he had seemed to be quite the nightmare in my eyes. It was loud, the glass plate constantly got knocked out of place, the manual leveling. Don't get me started. I didn't know how any of it worked so I was just spectating the whole ordeal. Well, an ex is an ex and I wanted to make all the cool prints that never got made, so I broke down and bought this one. It seemed to be a step up from the Ender 3 and let me just tell you, I was right. This printer is so quiet, the auto leveling is fantastic, and the magnetic plate is a game changer. I've managed to learn how to use this printer and the programming as someone who is extremely intimidated by technology. It's easy. I did run into an issue about a month in where the extruder temperature would drop and my prints would stop. So many ruined prints or prints with obvious issues to fix. I took to the Creality forum and apparently it's a pretty common problem for this printer. There are comments from people saying "try this" or "try that" and "this temporarily fixed my problem", but it seems to be the PID. You'll most likely have to run a PID autotune on the printer, unless you're just lucky. It's super easy to do too and there's a walk through on YouTube for it. But now my printer is working flawlessly. I also love that the printer is versatile. Now that I'm at a place where I know what I'm doing, I'm looking into upgrading to a larger printer (probably the K2 plus), and also beefing this one up just for fun. This little Creality journey has satiated my ADHD and my need for tinkering.
L**.
Caught fire after 2 prints!!!
** Update 2/3/23 **I turned on the printer this morning, and the display was all weird. Nothing showing but 2 thin lines. A second later, SMOKE and a heavy smell of burning, started coming out of the back of the display. Yes, it burned itself!!!Yes the voltage switch in the back is on the correct setting.Videos as requested for both defects were sent to the seller. I think I got a defective unit. I will update this thread if the seller stands behind their product!!!When I started researching 3D printers that were under $500, I was told the Ender 5 Pro was not for me because I was a beginner in the 3D printing world.The Ender 5 Pro could have been a great printer if it wasn't put together in such a way as to cut costs so the price pulls you in. On paper, it has GREAT features, however, the implementation of these is extremelly poor and hit or miss (as I have discovered while looking to fix problem after problem, and I was still in the putting it together phase!)That said, yes I am a beginner in 3D printing, however, I have been building computers from scratch since 1993 and I also have a solid mechanic and electronic backround. In other words, putting together this thing should not have been a problem... except it was.* The instructions (pictograms) are ridiculous at best, with large chunks of info missing.* The constuction of this thing, is cheap. You would think that it wouldn't be because it is all solid metal. However, 3 screws in and you realize that half the holes were drilled crooked and your screw is only going in at an angle.* Comgrow in their infinite wisdom (not) decided to pour generous amounts of hot glue on the connectors of the mainboard. Why? "because it doesn't hurt"... unless you want to upgrade parts or replace broken parts and then you have to spend 30 minutes chisseling hardened hot glue off of connectors, trying not to scratch your PCB!!!* The software that you must download is not 100% and you might need to write your own code/modify it/find someone else's modified code that matches your circumstances/issues.For all of the above and more, this is NOT a beginner's printer. This is not a "out of the box, a little put together and it works" kind of machine.Anyhoo, it took me a good 6 hours to put together, mostly because of the stop and go, Google/YouTube/Reddit nature of this since the instructions are crap.I also proactively upgraded to the CR-Touch auto-levelling kit and the Spider Hotend. Again, none of these 2 are for beginners either, as you need to take your machine apart to install them.The firmware for the BL/CR-Touch on the website is wrong. The motor turns BACKWARDS (unloading the filament instead of loading it). I don't understand why the company did not fix this in their code for the BL/CR-Touch updated firmware. The solution is to take apart the 5-pin connector and swap the wires. Ok, that fixed that problem. Except the "all new metal extruder" is so hard on (their) filament, that it shaves it, the motor can't load it, and nothing comes out of the nozzle unless you manually feed it with your fingers, while you hold down the spring loaded arm (that btw, LOOKS like it has an adjustable tensioner but does NOT). Also, the actual bolt holding the 2nd part of the feeder, fell off (sheared) right out of the box. I had to spend another $20 to get a new extruder!All in all, it has been 2 full days of doing nothing but fiddling with this thing, going to Facebook groups, watching YouTube videos, asking on Reddit and I don't have a print yet. I have half of a print because my fingers got tired of feeding the filament/holding the tensioner down and now I am waiting 2 days for Amazon to deliver my new extruder to see if this printer will work.I don't know about you, but for $400 (plus anoter $120 in upgrades and parts), I would expect this to work... So, don't let the price draw you in.It is pure serendipity that this printer has a good sized community around it to solve the problems you shouldn't even have had to begin with!!In other words, all 3D printers have their quirks, yes... but it shouldn't take a user days and days of research and troubleshooting to fix a product that was supposed to work right out of the box.This not the product for your kids' Christmas gift. For all the great features it has on paper, the execution is poor to say the least. Buy a cheaper printer and have lower expectations OR save up and buy a more expensive but reliable one,I hope and pray that the new extruder will fix my problem and I will FINALLY get my first print,I ran (and solved) all of these problems and I understood and executed the solutions suggested (re-write firmware code, take apart the machine itself, re-wire connectors, take apart individual parts and replace parts) because I have 3 decades of electronics experience and computer code writing under my belt. I can't imagine what a regular person would do.The conclusion: Not worth it. Save up and buy a more reliable product, even if on paper it has less bells and whistles.
Trustpilot
1 month ago
2 months ago